User Management
To manage the CMP workflow effectively, an Account or Group can create multiple Users and delegate different Access Rights to the Users. Assigning the appropriate Access Rights effectively limits each User's abilities to the scope of their role within the organization. Account Administrators can also organize a collection of Users into Groups, to which Access Rights can also be assigned.
Note:
Users can represent various entities within an organization, such as an employee or a customer that requires access to the Enterprise Portal.
Users, User Groups, and their Access Rights can be managed in the CAS User Management application, however, Local Users can be managed via the Users module of the Enterprise Portal as well. Functions not available or applicable to Enterprise Users, like the management of ACL Templates, User Groups, or Context Access Policies, are only available via CAS User Management.
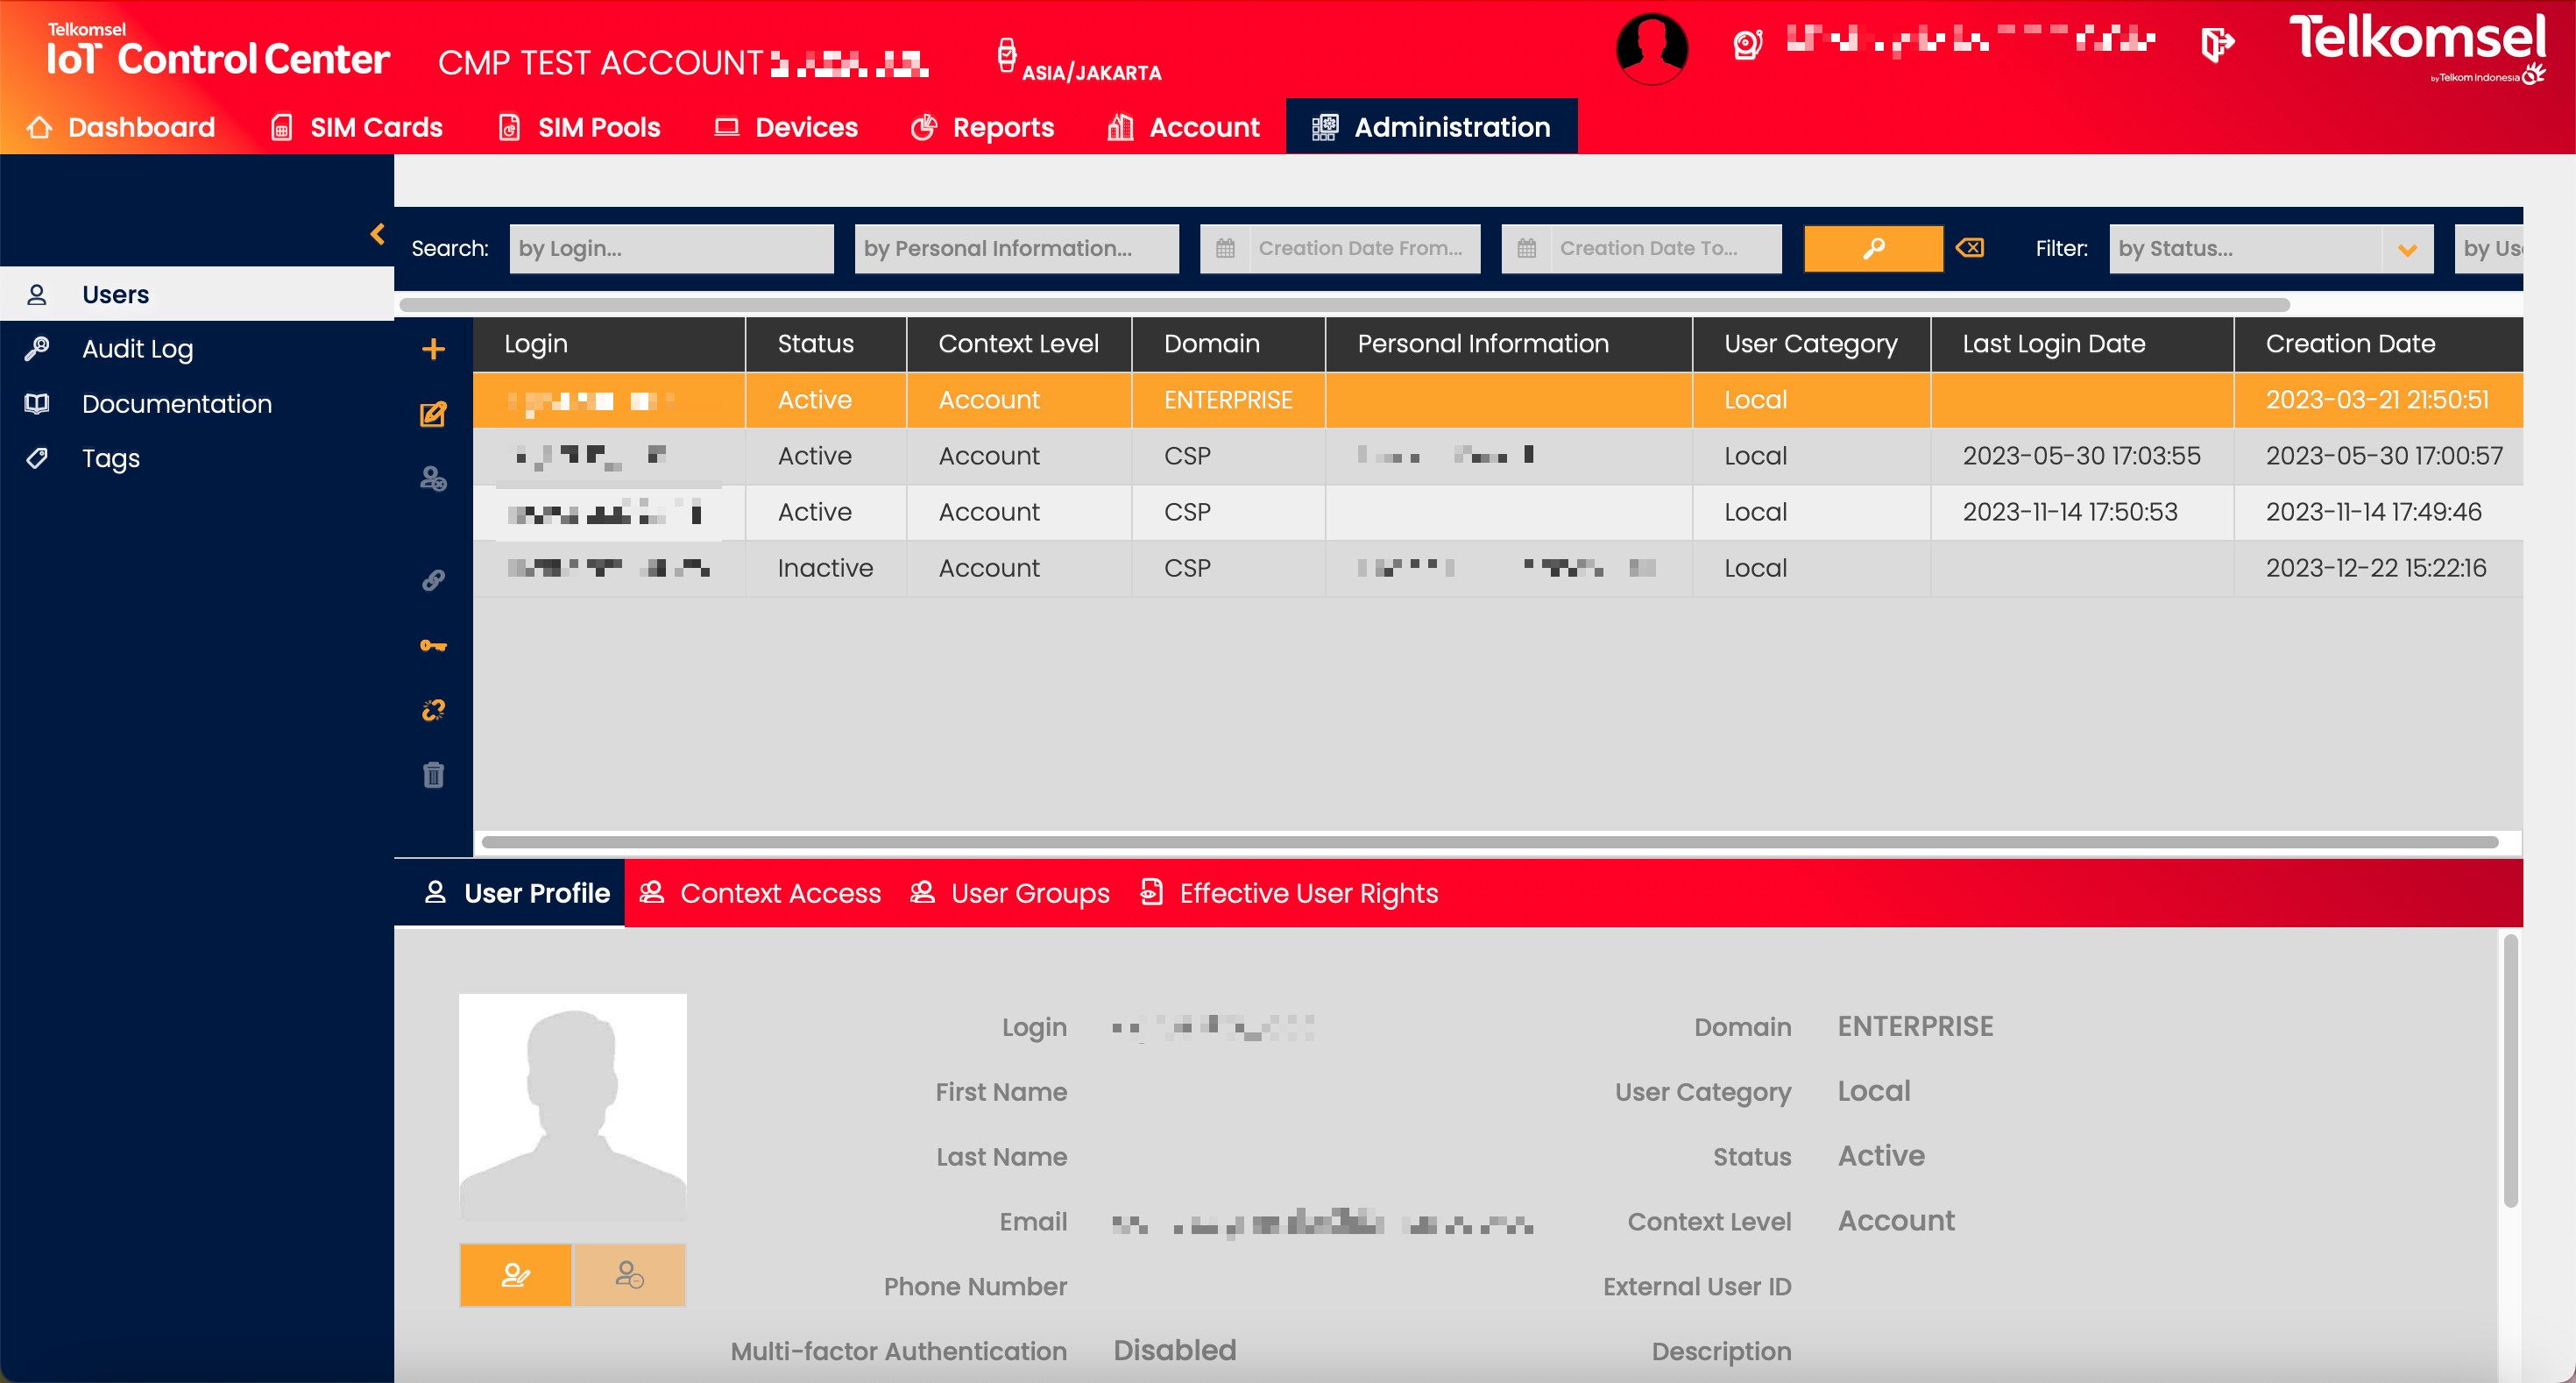
Users
The Users submenu of the Administration module allows Users to view all the Users of the currently selected context and one context level below, if applicable. Also, the management of Local Users is possible via the Users submenu of the Enterprise Portal.
Note:
Delegated Users are read-only and cannot be created or changed via EP.
Field | Description |
|---|---|
Login | Login information of the User. |
Status | Current status of the User. |
Context Level | In CMP the following Context Types are available:
Since it is not possible to mix different context levels for a single User, Users can only be assigned to one level. This means a User can only be assigned to
|
Domain | Domains allow grouping Users into different categories with similar behavior or semantics. By default, CMP supports the following two user domains:
Because of User Domain determines which CMP Portal a User can access, the following limitations have been implemented: Users assigned to
Combined with the Web Module Access User Right, the User Domain determines if a User can access a CMP Portal:
|
Personal Information | User-defined personal information of the User. |
User Category | Category of the User, that is defined by the Domain of the User.
|
Last Login | Date and time of the last time the User has logged in. |
Creation Date | Date and time of the creation of the User. |
Search for a User
The search option of the Users module allows Users to retrieve a list of Users by entering text into the Search field.
Search results may be filtered with the criteria given in the Search bar.
Filters:
- Creation Date Range
- Status
- User Category
The inserted search and filter criteria can be removed by clicking on the Clear search ![]() icon.
icon.

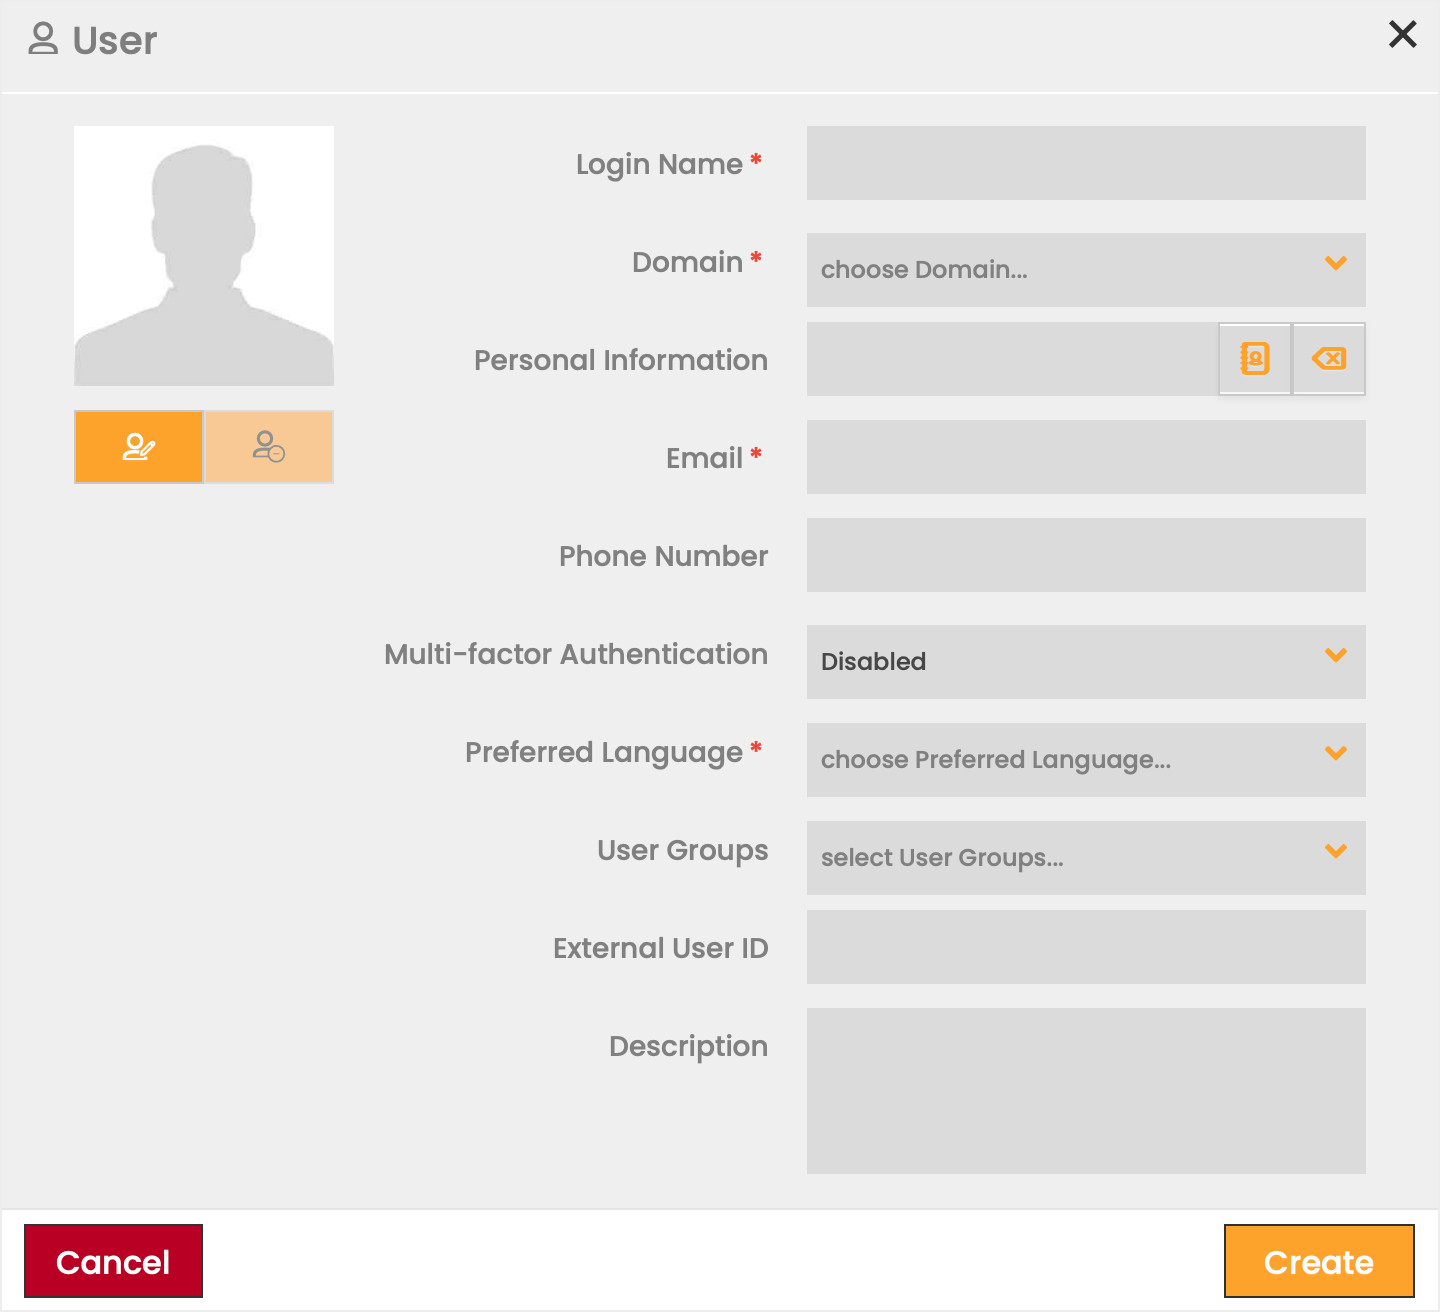
Create a User
Note:
Only Local Users can be created via the Enterprise Portal and sufficient Admin Rights as Account Admin or Portal Admin are required for User creation.
To create a User:
- Click on the Add
 icon.
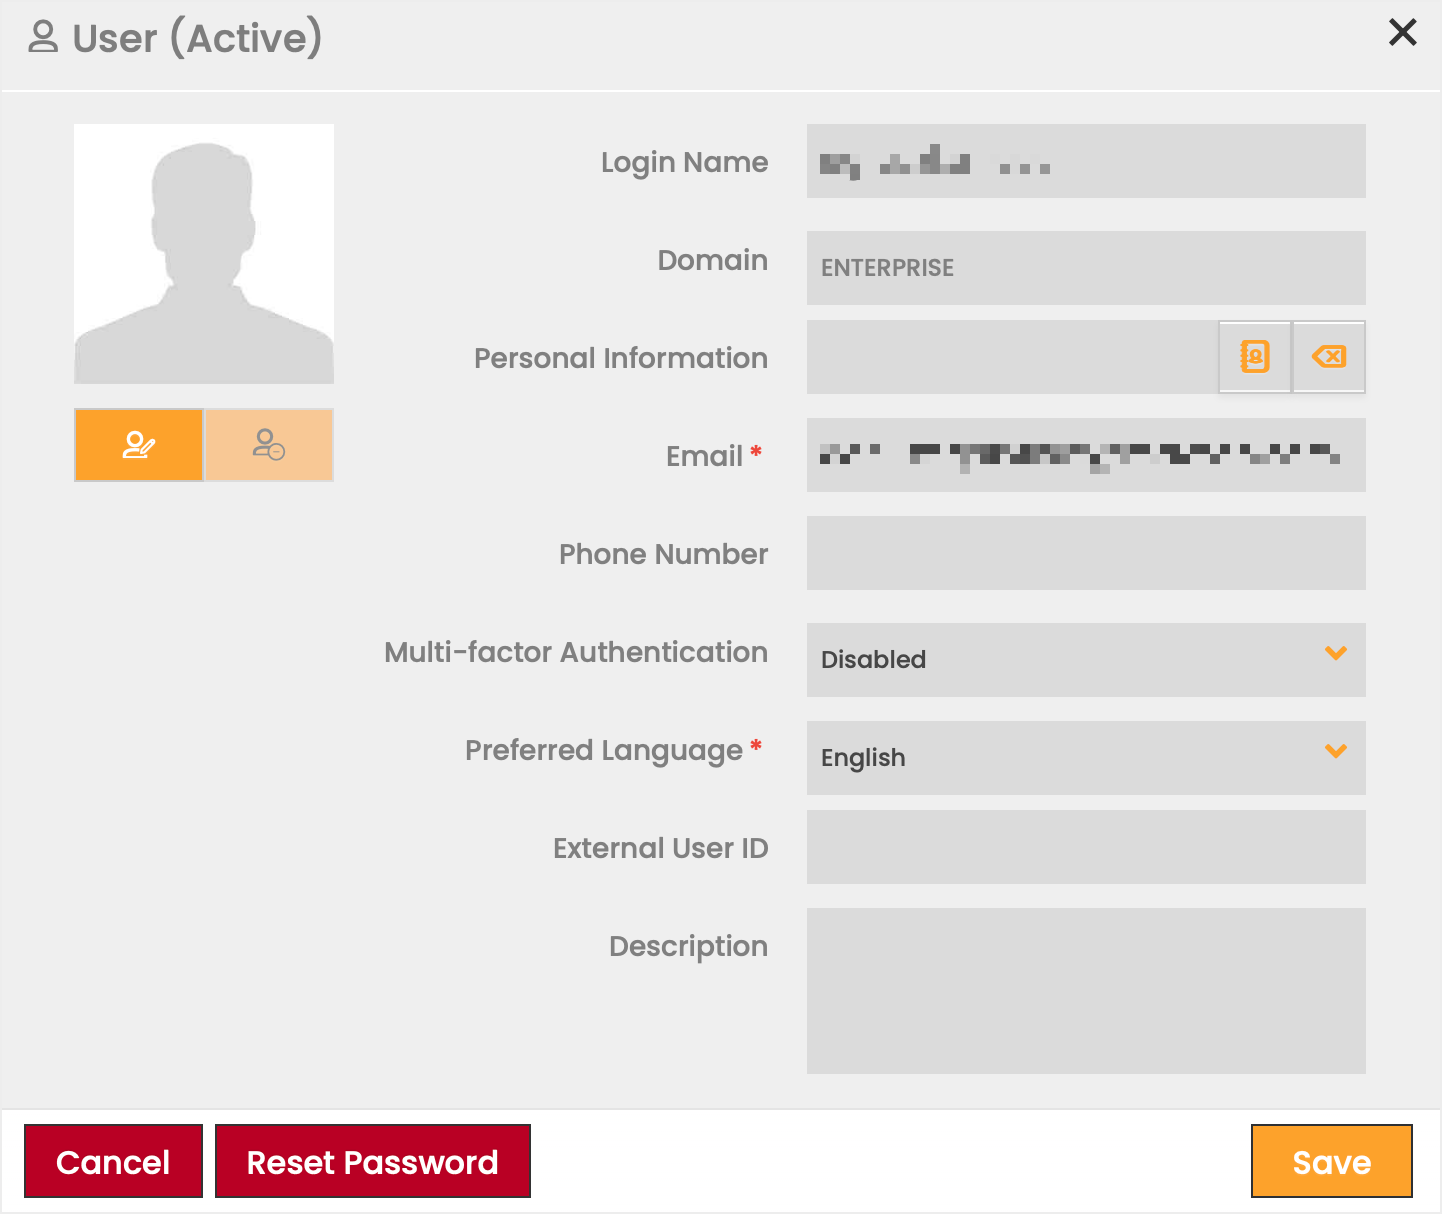
icon. - Define the information fields for the new User.
Fields marked by a red asterisk are mandatory. - Click Create to save the User.
Field | Description |
|---|---|
Login Name | Login information of the User. |
Domain | Domains allow grouping Users into different categories with similar behavior or semantics. By default, CMP supports the following two user domains:
Because of User Domain determines which CMP Portal a User can access, the following limitations have been implemented: Users assigned to
Combined with the Web Module Access User Right, the User Domain determines if a User can access a CMP Portal:
|
Personal Information | First and last name of the User. |
Email address of the User. | |
Phone Number | Phone number of the User. |
Multi-factor Authentication | Multi-factor Authentication settings of the User. The values available for selection are dependent on the features enabled on the CMP instance.
|
Preferred Language | Language preferred by the User in the use of the CMP. Currently supported languages:
Note: CMP supports English as a default language, the support of any additional language is available as an optional feature. Only languages licensed on the CMP instances will be available for selection as the preferred language. |
Context Access and User Groups | Contexts and User Groups the User will be assigned to. Note:
|
External User ID | External identifier for the User that can be used to refer to the User outside of the CMP context. |
Description | Comments/remarks regarding the User. |
Edit and Delete Users
Any User in status Draft, Active, or Inactive can be edited, however, only Users in status Inactive can be deleted.
- Click the Edit
 icon to modify the settings seen in the User creation.
 - Click the Delete
 icon to delete a User. Deleting a User anonymizes its data without deleting the User from the database. References to anonymized User records (e.g. audit log information) are kept.
Note: Deleted Users cannot be reactivated.
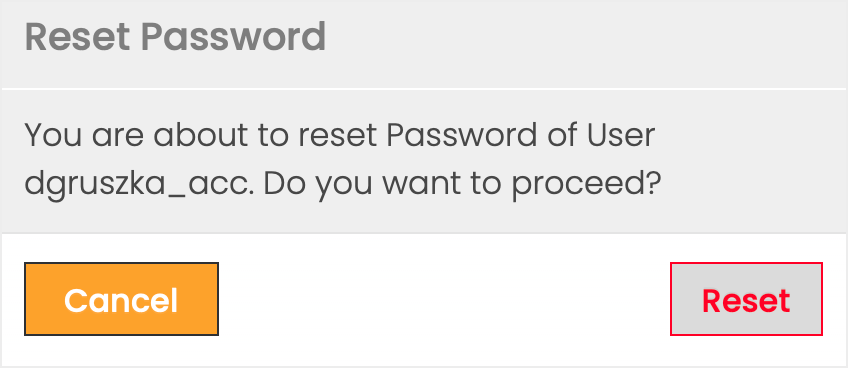
Reset User Password
Users with the appropriate Access Rights (e.g. Account Administrators, CSP Users) can reset any User's password via the Enterprise Portal's User Management section.
Enterprise Portal provides two options to reset passwords.
To reset passwords from the Users grid:
- Select an active User from the grid.
- Click on the Reset Password
 icon.
icon. - Click Confirm to finalize the password reset.
To reset passwords from the Edit dialog:
- Select an active User from the grid.
- Click the Edit icon.
- Click Reset Password.
- Click Confirm to finalize the password reset.
Password Reset by Admin Email Template
"Dear <defined login name>,
Password reset has been requested by an Administrator.
Your login name is: <defined login name>
Please use the following link to reset your password: reset password link"
Update User Status
Users exist as Draft, Active, Inactive, and Deleted in the CMP. A User must be activated before it can access the CMP modules according to its authentication and authorization settings.
- Click the Discard
 icon to remove information entered for a User in DRAFT status from the database.
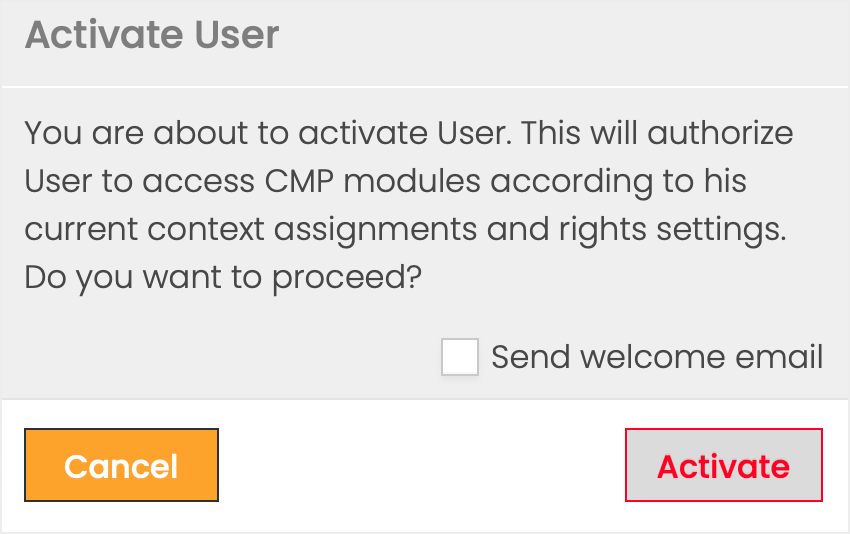
 - Click the Activate
 icon to change the status from DRAFT/INACTIVE to ACTIVE.
 - Click the Deactivate
 icon to change the status from DRAFT/ACTIVE to INACTIVE.
Send Welcome Email
At activation, a welcome email can be sent to new Users.
To send a welcome email:
- Select a User in DRAFT or INACTIVE status.
- Click the Activate icon.
- Select the Send welcome email checkbox.
- Click Activate to finalize the process.
Welcome Email Template
"Dear <firstname> <lastname>/<login-name>,
Welcome to the CMP platform.
Your login name is: <login name>
Please click the following link to set your new password: New Password"
User Extended Details
User Profile
The User Profile section gives a quick overview of the basic User information defined at User creation for the selected User.
The avatar of the User can be changed by clicking on the Edit User Avatar ![]() icon under the current profile picture or deleted by clicking on the Delete User Avatar
icon under the current profile picture or deleted by clicking on the Delete User Avatar ![]() icon.
icon.
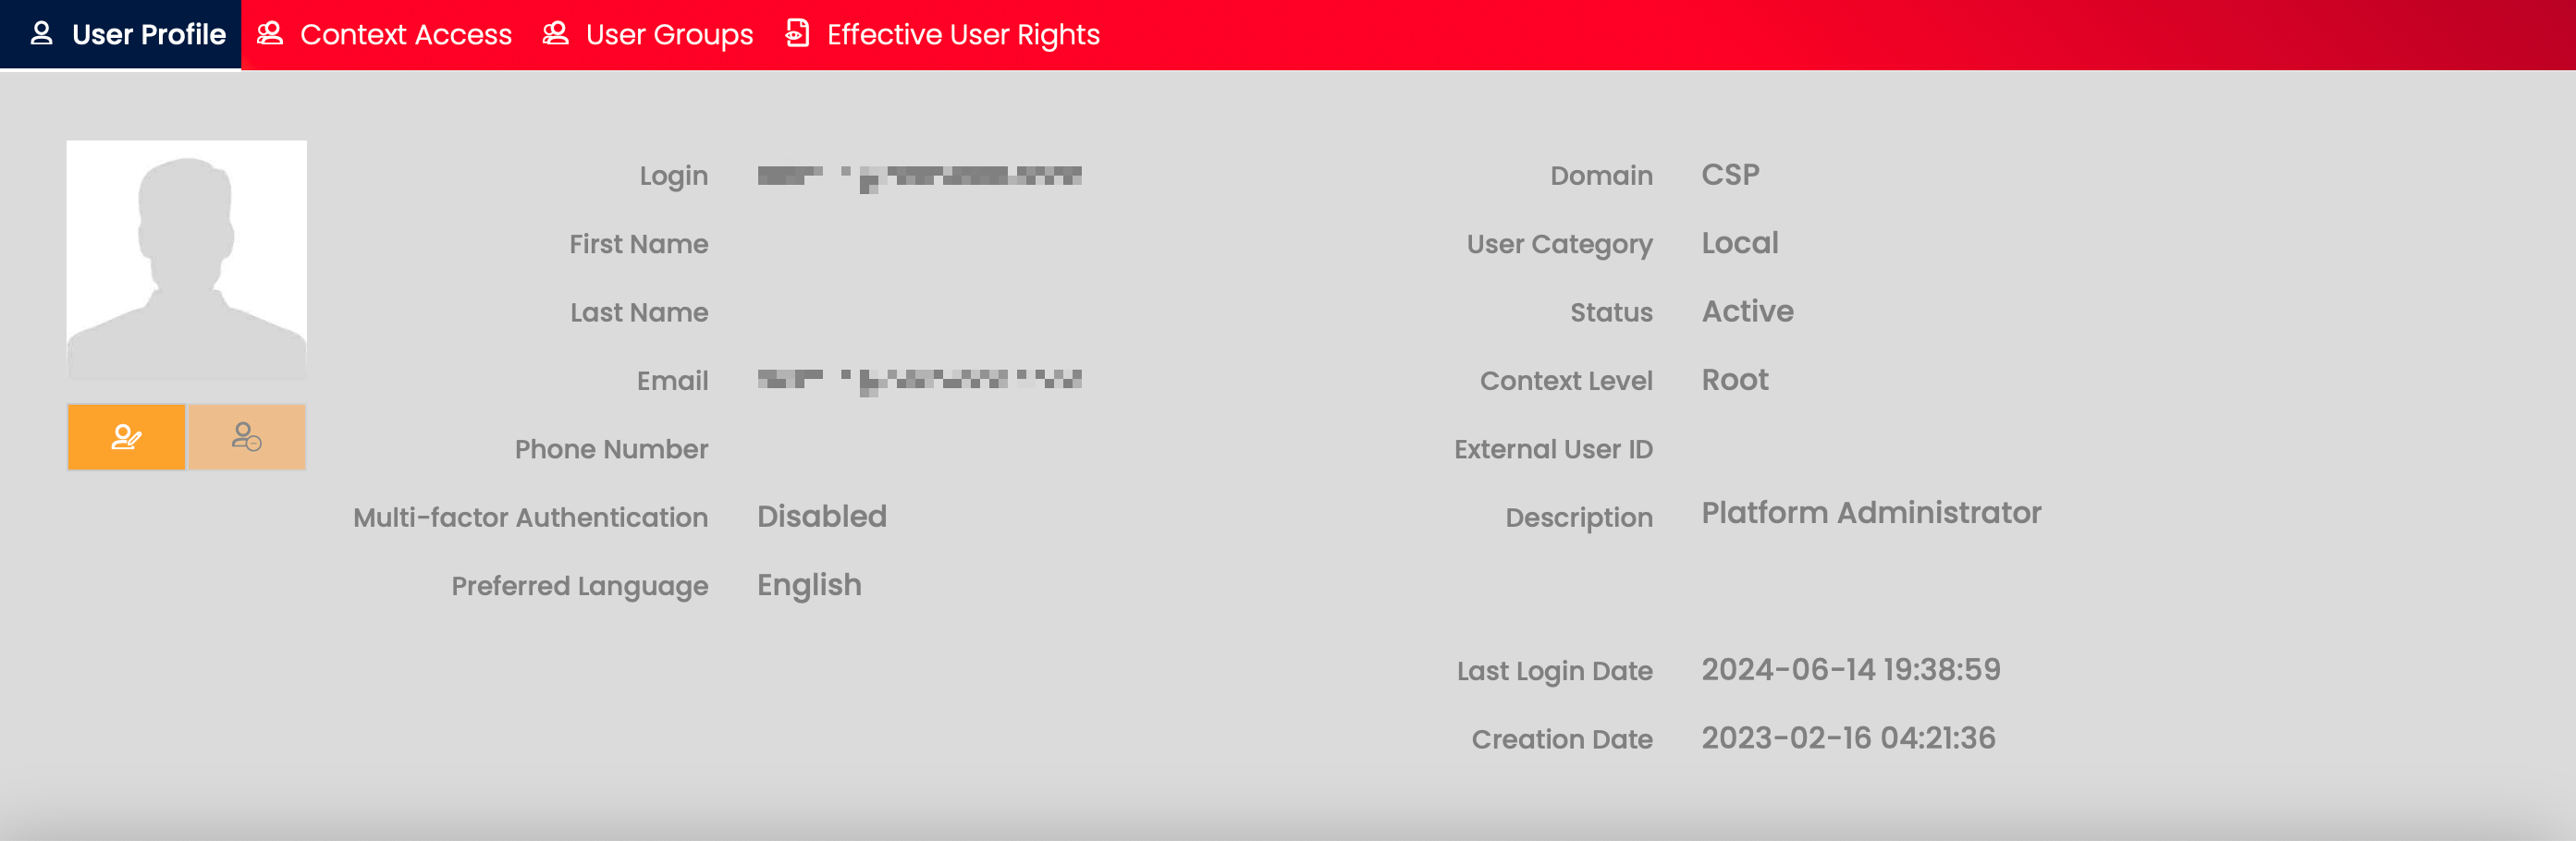
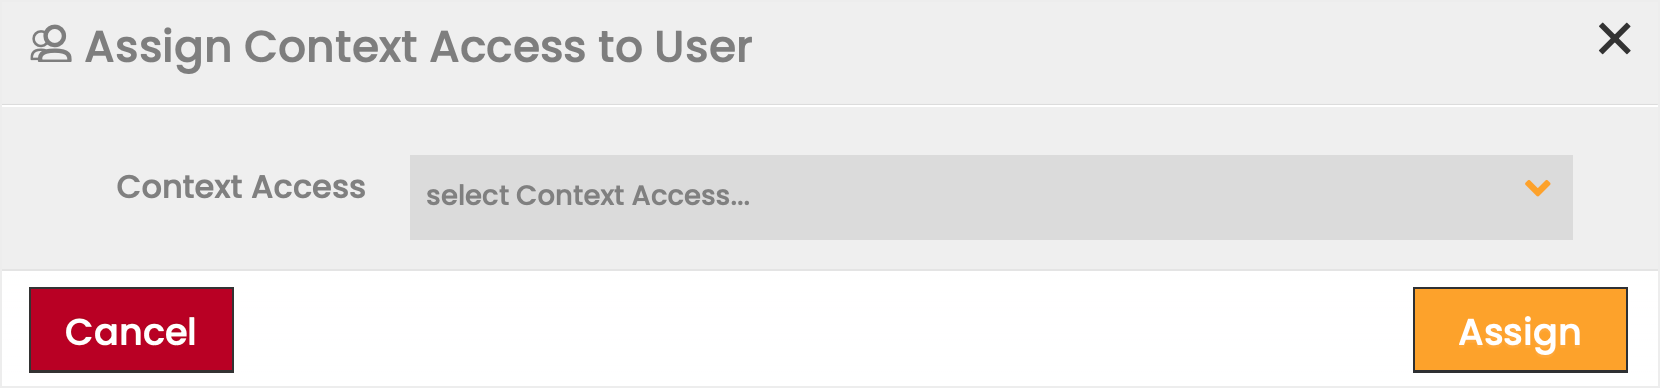
Context Access
The Context Access section allows Users to view and manage the list of all the Contexts the selected User currently belongs to.

Note:
Assignment of Context Access is only available on Root level.
To assign a Context Access to User:
- Click on the Add icon.
- Select a Context Access from the available options in the dropdown list.
- Click Assign to apply your selection.
To remove a Context Access from a User click on the Delete ![]() icon.
icon.
User Groups
The User Groups section allows Users to view and manage the list of User Groups the User currently belongs to.
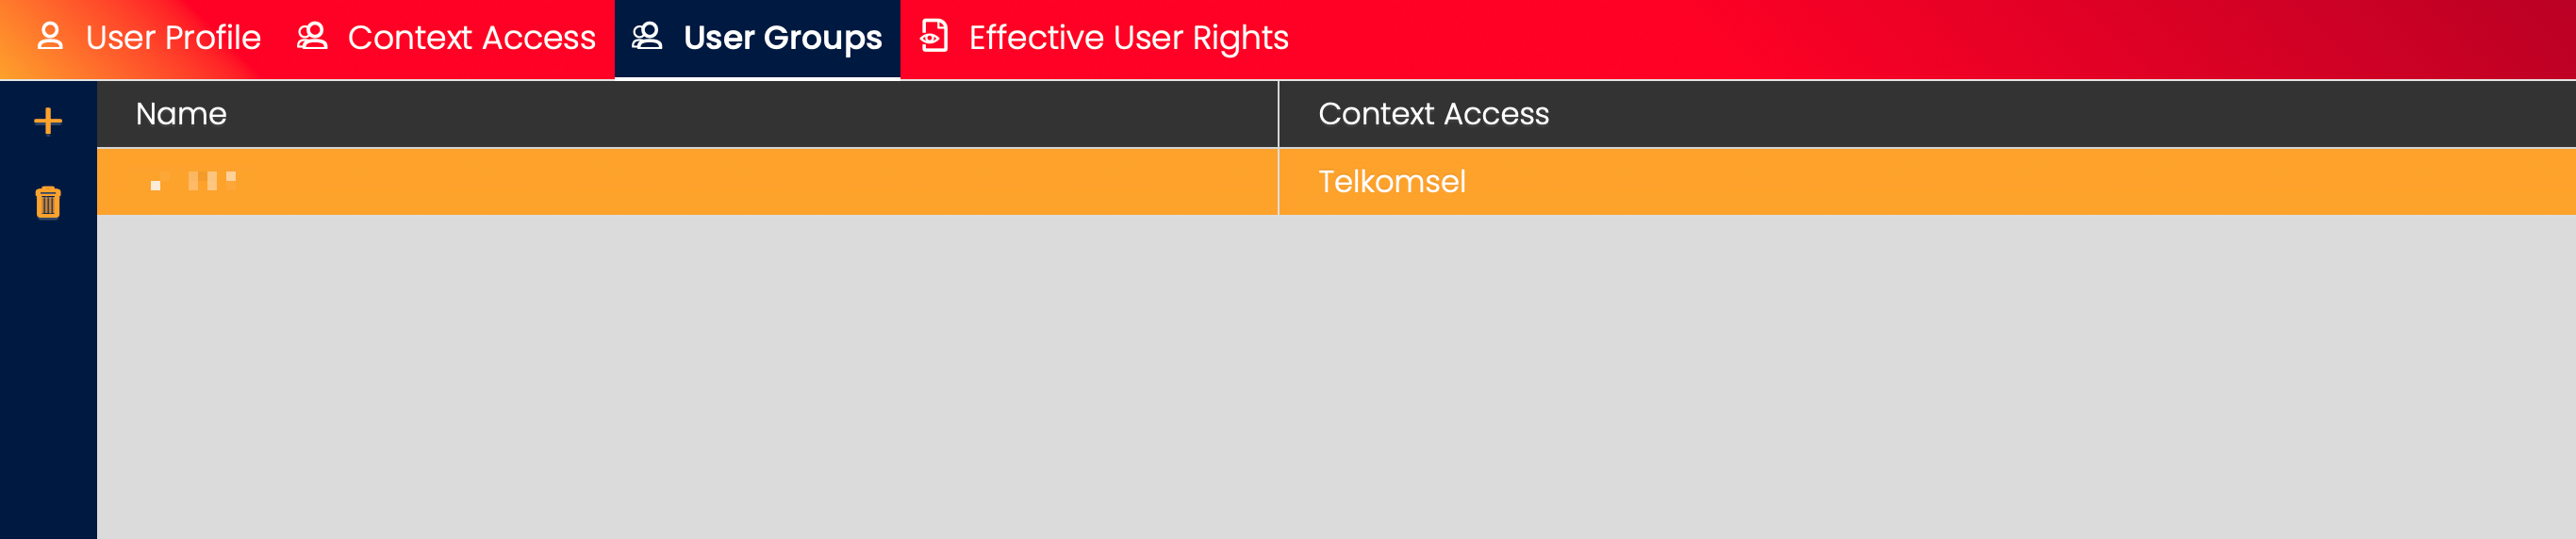
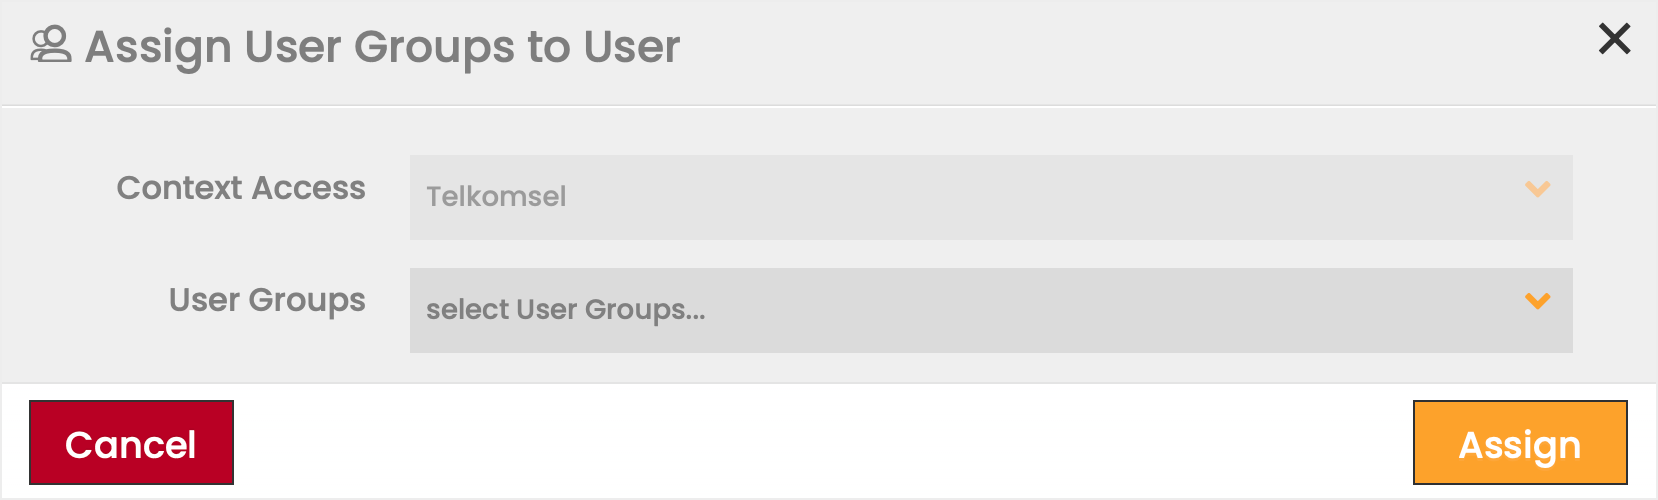
To assign User Groups to a User:
- Click on the Add icon.
- Select one or multiple User Groups from the available options in the dropdown list.
Note: The list of available User Groups is filtered by the Context Access. - Click Create to apply your selection.
To remove a User Group from a User click on the Delete ![]() icon.
icon.
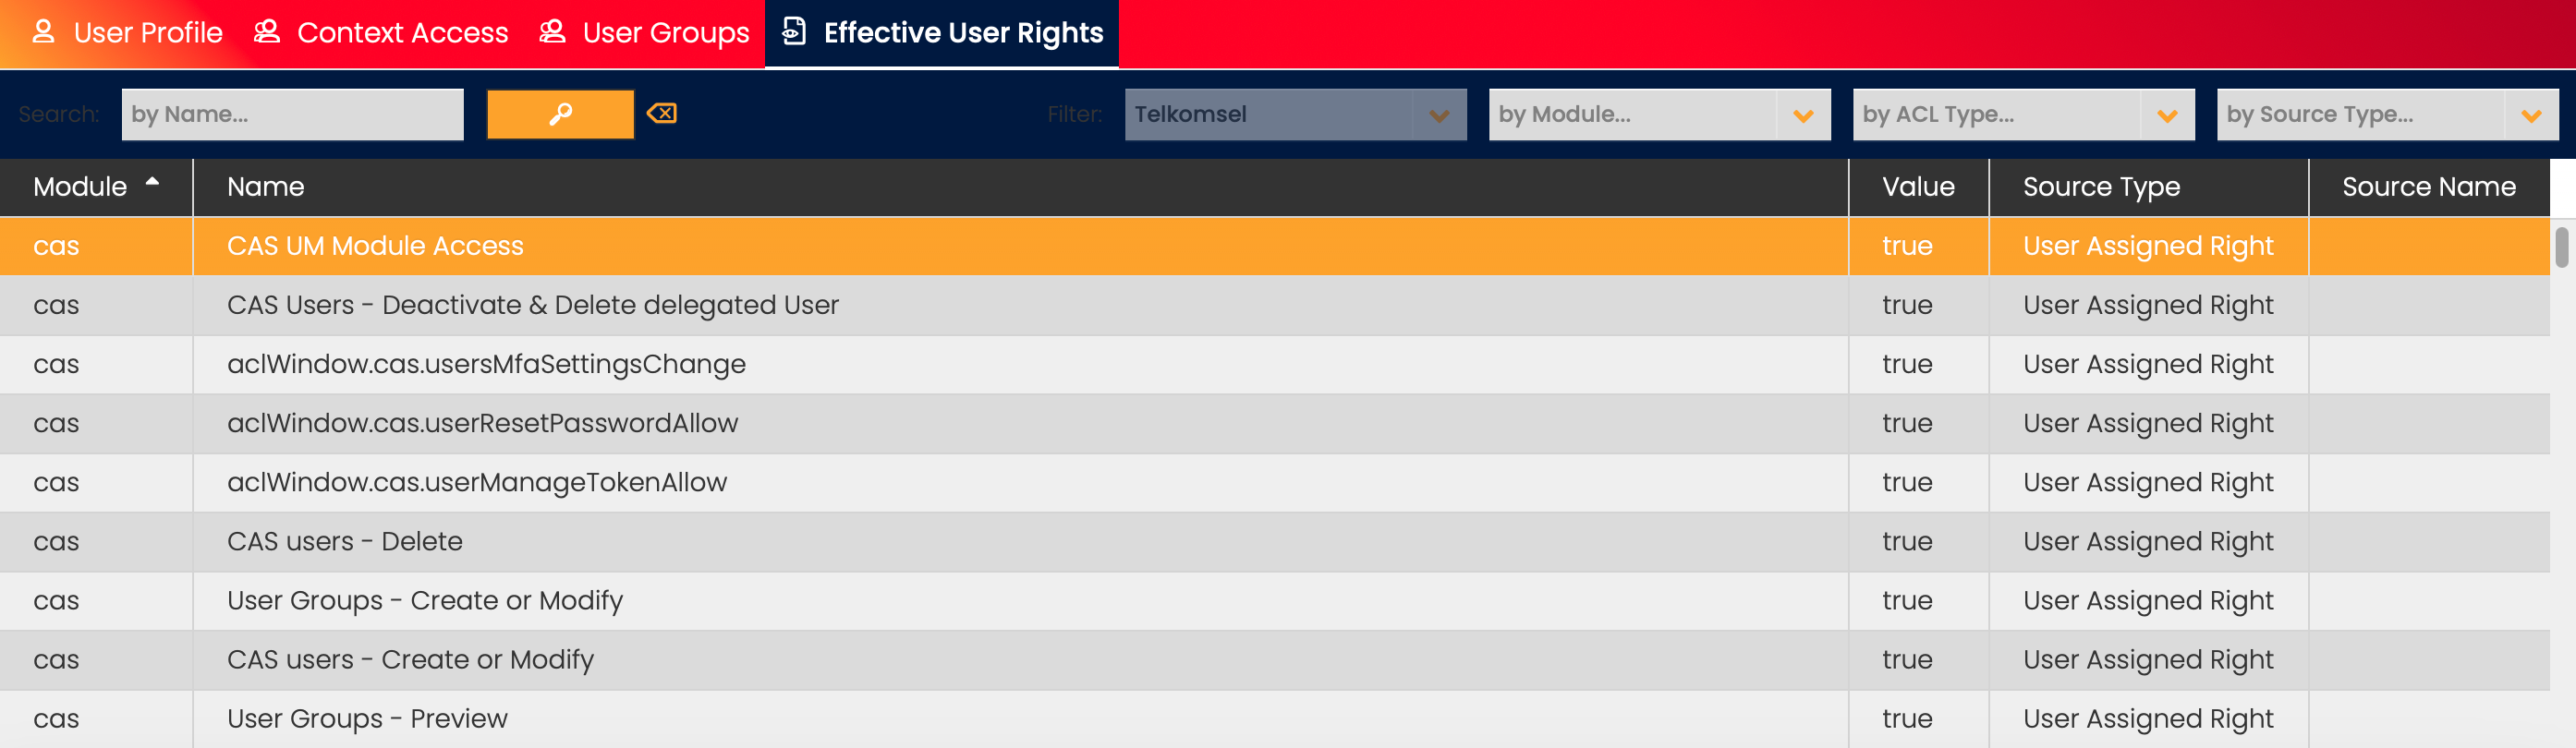
Effective Rights
If a User has access to a specific function (described by an ACL), in a given context (Root or Account context), the evaluation of several User Rights related concepts is required. The result of the evaluation defines the Effective User Rights of a given User in a given context. Note, that the Effective User Rights only make sense in combination with a context.
Effective User Rights are calculated every time the User logs into a CMP module or the context of the User has been switched. The following are the steps of the calculation of the Effective User Rights of a User in a given context:
- In case the given context has a context Access Policy defined, transfer the setting of it to the Effective User Rights list of the User. These Access Rights will remain valid unless overwritten in one of the next steps.
- In case the User is assigned to one or many User Groups, write the settings to the Effective User Rights list of the User.
For more than one User Groups the evaluation will follow the alphabetical order of the User Group Names, later Access Rights will overwrite earlier User Group Rights, or context Access Policy Rights remaining from step 1. - Access Rights assigned to a CAS User directly overwrite the Effective User Rights calculated in steps 1 and 2.
Note: This step is not used currently.
For each of the Effective User Rights, the Source Type and Source Name of the Effective Right's source is displayed.
Source Type |
|
|---|---|
Source Name | Name of the corresponding Context, or User Group (see Source Types above). The name is empty for Source Type User assigned right. |
In the case of an Account Level User, the displayed set of Effective Rights depends on the selected Account.
The information displayed in this tab is read-only.
The tab allows Users to filter the listed rights by Context Access, Module, ACL Type, and Source Type, and to search User Rights by Name.